

Every command in this guide was tested on Ubuntu 26.04 and RHEL 10. You’ll learn how to install lazygit, understand its interface, stage and commit changes, create and switch branches, view commit history, resolve merge conflicts, and stash changes—all without leaving a single terminal window.
Normally, you’d run git status, use git add -p to stage the right changes, check them with git diff --staged, commit with git commit, and then verify everything with git log --oneline --graph.
That’s several commands just to complete one change. With lazygit, you can do all of this from one screen using the arrow keys and a few simple keyboard shortcuts.
lazygit is a terminal-based user interface (TUI) for Git. It uses the same Git installation you already have, but presents it in a visual, keyboard-friendly interface. It doesn’t replace Git or create a different version of it.
Every action you perform in lazygit runs the corresponding Git command behind the scenes.
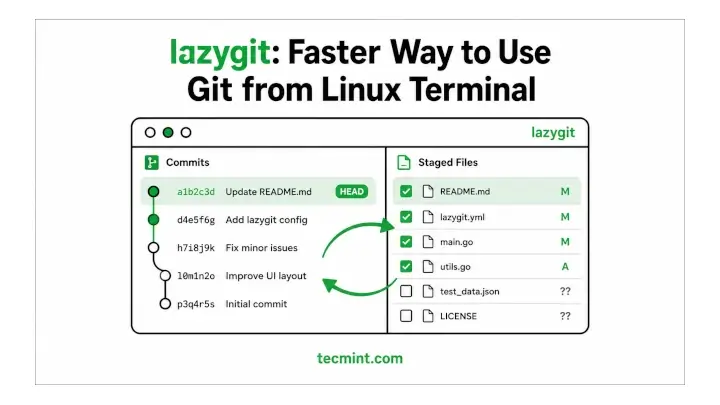
Instead of typing one command after another, you can see everything in a single screen. The interface displays your working directory, staged and unstaged files, branches, commit history, and stashes in separate panels, making it easy to understand the current state of your repository at a glance.
You can move between panels using the arrow keys or h, j, k, and l if you’re familiar with Vim-style navigation.
Most common Git tasks are performed with single-key shortcuts. For example, press Space to stage or unstage a file, c to create a commit, p to pull changes from the remote repository, and P to push your commits.
The biggest advantage is that you spend less time remembering Git commands and more time focusing on your code. Since every action still uses Git underneath, anything you learn in lazygit also helps you better understand how Git works.
Installing lazygit on Ubuntu/Debian and RHEL/Rocky Linux
There are a few ways to install lazygit, but the most reliable method is to download the latest prebuilt binary directly from its GitHub releases page. This works the same on almost every Linux distribution and ensures you get the newest version.
LAZYGIT_VERSION=$(curl -s "https://api.github.com/repos/jesseduffield/lazygit/releases/latest" | grep -Po '"tag_name": "v\K[^"]*')
curl -Lo lazygit.tar.gz "https://github.com/jesseduffield/lazygit/releases/latest/download/lazygit_${LAZYGIT_VERSION}_Linux_x86_64.tar.gz"
tar xf lazygit.tar.gz lazygit
sudo install lazygit /usr/local/bin
Here’s what each command does:
curl -s "https://api.github.com/repos/jesseduffield/lazygit/releases/latest” fetches information about the latest lazygit release from the GitHub API.grep -Po '"tag_name": "v\K[^"]*'extracts only the latest version number from the JSON response.curl -Lo lazygit.tar.gzdownloads the matching Linux archive for that version.tar xf lazygit.tar.gz lazygitextracts only the lazygit executable from the archive.sudo install lazygit /usr/local/bincopies the binary into/usr/local/bin, which is already in the system’sPATHon most Linux distributions. Since this directory requires administrator privileges, only this step needssudo.
If your distribution already includes lazygit in its package repositories, using the package manager is even easier because future updates are handled automatically.
On Ubuntu 24.04 and later or Debian 12 and later, install it with:
sudo apt update
sudo apt install lazygit
On RHEL and Rocky Linux, lazygit isn’t available in the official repositories yet, but you can install it from the community-maintained COPR repository:
sudo dnf copr enable atim/lazygit -y
sudo dnf install lazygit -y
After the installation finishes, verify that everything is working by checking the installed version:
lazygit --version
If the installation was successful, you’ll see output similar to this:
lazygit --version
commit=aafe61082e7ed383d318fd40e48f85645e6afc7b, build date=2026-07-15T11:34:26Z, build source=binaryRelease, version=0.63.1, os=linux, arch=amd64, git version=2.43.0
The important part is the version number:
version=0.63.1– The installed version of lazygit.git version=2.43.0– The Git version that lazygit is using.- The remaining fields, such as the commit hash, build date, operating system, and architecture, are build details that are mainly useful for debugging.
If you get a command not found error after installing from the binary archive, your shell may not have refreshed its PATH. Close and reopen your terminal, or run:
hash -r
Then run lazygit --version again. Once you see the version information, you’re ready to start using lazygit.
Note: If lazygit saved you from typing git add -p for the tenth time today, share this guide with someone who’s still doing it the hard way.
First Look at the lazygit Interface
Open a terminal inside any Git repository and run:
lazygit
If you’re inside a Git repository, lazygit opens a full-screen interface that organizes the most important Git information into separate panels. Instead of switching between multiple Git commands, you can see everything in one place.
By default, the screen is divided into five main panels:
- Status – Shows an overview of your repository and the currently selected item.
- Files – Lists modified, untracked, staged, and unstaged files.
- Branches – Displays your local and remote branches.
- Commits – Shows your commit history.
- Stash – Lists any stashed changes.
The Files panel is where you’ll spend most of your time. It shows all the files that have changed in your working directory.
- Red entries are unstaged changes.
- Green entries are staged changes.
- ? indicates an untracked file that Git isn’t tracking yet.
To stage or unstage a file, select it with the arrow keys and press Space. If you want to stage every changed file at once, press a.
You don’t have to cycle through panels one by one. Press 1 through 5 to jump directly to a specific panel, which makes navigation much faster once you get used to the layout.
After a few minutes of using these shortcuts, moving around the interface becomes second nature, and you’ll rarely need to think about where everything is. The next step is learning how to stage changes, review them, and create your first commit without leaving the lazygit interface.
Staging and Committing Changes
Let’s say you’ve modified three files, but only two of them are ready to commit. In the Files panel, use the Up and Down arrow keys (or j and k) to select the files you want, then press Space to stage each one. The staged files turn green, while the file you leave unstaged stays red in your working directory.
Before creating a commit, it’s a good idea to review exactly what you’re about to save. Select a staged file and press Enter to open its diff. This shows the same information you’d normally get from git diff --staged, but directly inside the lazygit interface, so you don’t have to switch back to the command line.
If everything looks correct, press c to create a commit. Enter your commit message and press Enter again. lazygit runs git commit for you and immediately updates the Commits panel with the new commit.
You should see an entry similar to this:
14:32:07 | main | commit a3f1c92 | "Fix nginx upstream timeout in load balancer config"
This confirms that the commit was created successfully. The short hash (a3f1c92 in this example) uniquely identifies that commit. If you ever want to inspect it later from the command line, you can use:
git show a3f1c92
Creating a commit is only half the workflow. Next, you’ll learn how to create and switch branches in lazygit without remembering commands like git checkout or git switch.
Branching and Switching in lazygit
Press 3 to switch to the Branches panel. Here, you’ll see all your local branches along with any remote-tracking branches. The branch you’re currently working on is highlighted, making it easy to see where you are.
To create a new branch, press n. lazygit prompts you for a branch name, creates the branch, and switches to it without requiring you to type a Git command.
Switching to another branch is just as simple. Select the branch you want using the arrow keys (or j and k) and press Space. lazygit checks out that branch immediately, so you don’t need to remember commands like git switch or git checkout.
To merge another branch into your current branch, select it and press M. If Git detects that the merge will create conflicts, lazygit lets you know right away and guides you through resolving them instead of leaving you to discover the problem later.
With branching taken care of, the next thing you’ll probably want to do is review previous commits, compare changes, or find out when a particular change was made. That’s where the Commits panel comes in.
Switching branches with a single key press may seem like a small convenience, but it can save you from frustrating typos and accidental checkouts. If you’ve ever mistyped a branch name at the command line, share this guide with a teammate who’ll appreciate the shortcut.
Resolving Merge Conflicts in lazygit
Merge conflicts are sometimes unavoidable when two branches modify the same part of a file. Instead of dropping you back to the command line, lazygit helps you work through them from its interface.lazygit
When a merge results in conflicts, the affected files appear in the Files panel with a ! next to them. Select a conflicted file and press Enter to open the conflict view.
The screen displays three versions of the file side by side:
- Your changes (current branch)
- Incoming changes (the branch being merged)
- The merged result, where you’ll decide what the final content should be
Move between conflict blocks using the Up and Down arrow keys (or j and k). For each conflict, you can choose which changes to keep or combine both versions where appropriate. This presents the same information that Git normally marks with <<<<<<<, =======, and >>>>>>>, but in a much easier-to-read layout.
After resolving all conflicts in a file, press Space to stage it. Repeat the process for any remaining conflicted files.
Once every conflicted file has been resolved and staged, press c to create the merge commit. lazygit runs the merge commit for you, completing the merge without requiring you to leave the interface.
With the merge complete, the final workflow to learn is stashing, which lets you temporarily save unfinished work so you can switch tasks or branches without losing your changes.
Common Mistake: Committing Before All Conflicts Are Resolved
One of the easiest mistakes to make during a merge is committing your changes before every conflict has been resolved.
If a file still contains Git’s conflict markers, such as <<<<<<<, =======, and >>>>>>>, those markers can end up being committed into your repository if you don’t remove them first. This can break your code and make the commit harder to fix later.
Although lazygit makes conflict resolution much easier, it doesn’t automatically prevent you from committing incomplete work. Before pressing c to create the merge commit, take a quick look at the Files panel.
If you still see any files marked with a !, they have unresolved conflicts and need your attention. Open each file, resolve the remaining conflicts, and stage it by pressing Space. Once all the ! markers are gone, you can safely create the merge commit.
Spending a few extra seconds checking for unresolved conflicts is much easier than fixing a broken commit after it has already been pushed.
Stashing Changes You’re Not Ready to Commit
Not every change is ready to be committed. Sometimes you’re halfway through a task when you need to switch branches to fix a bug or review someone else’s code. Instead of creating a temporary commit, you can stash your changes and come back to them later.
In the Files panel, press s to stash your current changes. lazygit runs git stash in the background, saves your uncommitted work, and restores your working directory to a clean state.
You can now switch branches and work on something else without your unfinished changes getting in the way.
When you’re ready to continue, return to the original repository and open the Stash panel. Select the stash you want and press Space to apply it. This is the equivalent of running git stash pop from the command line, but without having to remember stash names or index numbers like stash@{0}.
Your changes are restored exactly as you left them, allowing you to continue working from where you paused.
Stashing is especially useful when you need to quickly switch tasks without creating unnecessary commits or losing unfinished work.
Note: If you’ve ever had to remember stash entries like stash@{2} or stash@{3}, you’ll appreciate how much simpler lazygit makes it. Share this guide with a teammate who’s still keeping track of stash indexes the hard way.
Custom Keybindings and Configuration
lazygit stores its configuration in a YAML file, which is usually located at:
~/.config/lazygit/config.yml
If the configuration file doesn’t exist yet, you can create it yourself. To see where lazygit expects the configuration file to be, run:
lazygit --config
One of the first settings many users customize is the default text editor used for writing commit messages or resolving conflicts. For example, to use Vim, add the following to your config.yml file:
os:
  edit: 'vim {{filename}}'
If you prefer another editor, simply replace vim with your preferred command. For example:
nano {{filename}}code --wait {{filename}}nvim {{filename}}
Save the file and restart lazygit for the changes to take effect. Configuration changes aren’t reloaded while lazygit is already running.
Common Mistake: Incorrect YAML Indentation
The config.yml file uses YAML, which is very particular about indentation. A small formatting mistake can cause your configuration to be ignored.
For example, avoid mixing tabs and spaces, and keep the indentation consistent:
os:
  edit: 'nano {{filename}}'
Using two spaces for each indentation level is the safest approach. If your settings don’t seem to work, the first thing to check is the file’s indentation. A misplaced tab or extra space is often the cause.
Note: If fixing your config.yml finally made lazygit use your preferred editor, share this guide with a teammate who’s still wondering why a tiny YAML indentation mistake keeps their settings from working.
Common Errors and Fixes
Even though lazygit is easy to use, you may run into a few common problems when installing or launching it. Here are the most frequent issues and how to fix them.
Permission denied During Installation – If you see a Permission denied error while copying the binary into /usr/local/bin, you’re probably running the install command without administrator privileges.
Since /usr/local/bin is owned by the root user, you need to run the final installation step with sudo:
sudo install lazygit /usr/local/bin
After entering your password, the binary will be installed successfully.
Files Panel Is Empty
If lazygit starts but the Files panel doesn’t show any files, you’re most likely not inside a Git repository.
First, verify your current location by running:
git status
If Git reports fatal: not a git repository, change to the correct project directory or initialize a new repository with git init.
If you’re already inside a repository, make sure you’re working in a tracked directory and that there are actually modified or untracked files to display.
Colors or Panels Don’t Display Correctly
If the interface shows incorrect colors, missing borders, or box characters instead of proper panel lines, your terminal may not be using 256-color support.
Temporarily enable it with:
export TERM=xterm-256color
To make the change permanent, add the same line to your shell’s startup file, such as ~/.bashrc or ~/.zshrc, then restart your terminal or reload the configuration.
Once your terminal reports the correct TERM value, lazygit should render its interface correctly.
If one of these fixes just saved you from a frustrating debugging session, share this guide with the next person who runs into the same problem. A quick tip can save someone a lot of time.
Conclusion
You now know how to install lazygit, navigate its interface, stage and commit changes, create and switch branches, resolve merge conflicts, and stash unfinished work—all without leaving a single terminal window.
Although lazygit provides a faster and more visual way to work with Git, it’s still using the same Git commands behind the scenes. That means everything you learn in lazygit also helps you build a stronger understanding of Git itself.
The best way to get comfortable with it is to use it in a real project. Open one of your Git repositories, run:
lazygit
Then try staging your next changes from the Files panel instead of using git add. Review the diff, create a commit, or switch branches all from the same interface. After a few sessions, you’ll likely find yourself spending less time typing commands and more time focusing on your code.
Do you use lazygit as your primary Git interface, or do you still prefer the command line for some tasks? Let us know in the comments—we’d love to hear how you use Git in your daily workflow.
If this article helped, with someone on your team.
