

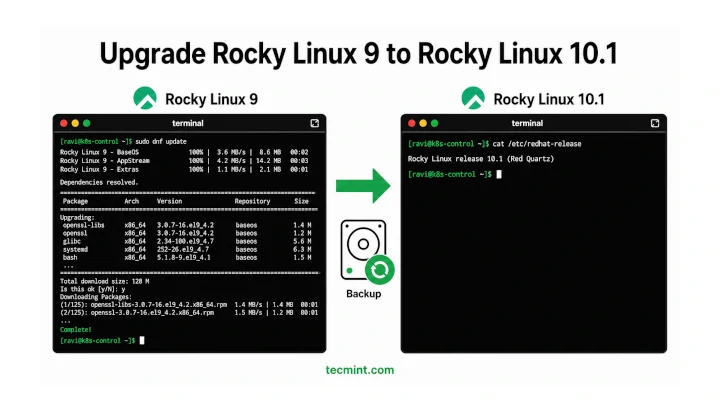
In this article, we’ll show you how to move from Rocky Linux 9 to Rocky Linux 10.1, covering everything from backing up your current system to restoring your services on the fresh install.
Rocky Linux does not support direct in-place upgrades between major versions, and that decision is intentional. The official Rocky Linux documentation recommends doing a fresh installation when moving from Rocky Linux 9 to Rocky Linux 10.1, then restoring your data and applications from backup afterward.
You may still find older guides online that suggest using tools like Leapp or ELevate to force an in-place upgrade. However, the Rocky Linux team never officially supported that method, and ELevate dropped Rocky Linux support in November 2025. In practice, that upgrade path is no longer reliable or recommended.
A clean installation takes a little more preparation, but it avoids many of the problems that often appear after forced upgrades, such as leftover EL9 packages, broken dependencies, service failures, or unstable system behavior later on.
In this guide, you’ll learn how to safely migrate from Rocky Linux 9.7 to Rocky Linux 10.1 using the recommended method. We’ll cover checking hardware compatibility, exporting installed package lists, backing up important files and data, performing the fresh Rocky Linux 10.1 installation, and restoring your applications and services afterward.
All steps in this article were tested using Rocky Linux 9.7 as the source system and Rocky Linux 10.1 as the target system.
Check CPU Compatibility Before Upgrading
Before you start the migration, first make sure your system hardware is compatible with Rocky Linux 10.1, because there is one important change in Rocky Linux 10.1 is that it no longer supports older x86-64-v2 CPUs, and the minimum supported CPU level is now x86-64-v3.
In simple terms, that means you need a relatively modern processor:
- Intel Haswell generation (2013) or newer.
- AMD Excavator generation (2015) or newer.
If your CPU does not support x86-64-v3 instructions, Rocky Linux 10.1 will not boot at all, even after a successful installation. So, run the following command on your existing Rocky Linux 9 system to verify CPU support:
grep -o 'avx2\|bmi1\|bmi2\|f16c\|fma\|abm\|movbe\|xsave' /proc/cpuinfo | sort -u
You should see output similar to this:
abm
avx2
bmi1
bmi2
f16c
fma
movbe
xsave
If all eight flags appear, your processor supports x86-64-v3, and you can safely continue with the Rocky Linux 10.1 installation. If one or more flags are missing, stop here before proceeding further, because Rocky Linux 10.1 will not run properly on that hardware.
In that case, your options are:
- Continue using Rocky Linux 9 until its end-of-life in May 2032.
- Upgrade to newer hardware that supports x86-64-v3.
- Run Rocky Linux 10.1 inside a compatible virtual machine on newer hardware.
It’s much better to verify compatibility now than to discover the problem after reinstalling the system.
Export Your Installed Packages and Repository List
Before reinstalling the system, create a complete snapshot of the software currently installed on your Rocky Linux 9 machine, which makes it much easier to rebuild the server later without forgetting important packages or repositories.
Start by exporting the list of installed packages.
sudo dnf list installed > ~/installed-packages.txt
The command saves the full installed package list into a file called installed-packages.txt inside your home directory. It does not print the package list directly to the terminal, so don’t worry if the screen looks mostly empty afterward.
To confirm the file was created successfully, you can check it with:
less ~/installed-packages.txt
Output:
Installed Packages
NetworkManager.x86_64                    1:1.54.0-3.el9_7              @anaconda
NetworkManager-libnm.x86_64              1:1.54.0-3.el9_7              @anaconda
NetworkManager-team.x86_64               1:1.54.0-3.el9_7              @anaconda
NetworkManager-tui.x86_64                1:1.54.0-3.el9_7              @anaconda
acl.x86_64                               2.3.1-4.el9                   @anaconda
alternatives.x86_64                      1.24-2.el9                    @anaconda
attr.x86_64                              2.5.1-3.el9                   @anaconda
audit.x86_64                             3.1.5-7.el9                   @anaconda
audit-libs.x86_64                        3.1.5-7.el9                   @anaconda
authselect.x86_64                        1.2.6-3.el9                   @anaconda
authselect-libs.x86_64                   1.2.6-3.el9                   @anaconda
avahi-libs.x86_64                        0.8-23.el9                    @anaconda
basesystem.noarch                        11-13.el9.0.1                 @anaconda
bash.x86_64                              5.1.8-9.el9                   @anaconda
binutils.x86_64                          2.35.2-67.el9                 @anaconda
binutils-gold.x86_64                     2.35.2-67.el9                 @anaconda
bzip2-libs.x86_64                        1.0.8-10.el9_5                @anaconda
c-ares.x86_64                            1.19.1-2.el9_4                @anaconda
...
Next, export the enabled repository list, which is especially useful if you use third-party repositories like EPEL, Remi, Docker, or others.
sudo dnf repolist > ~/repo-list.txt
This creates another file named repo-list.txt in your home directory, but before moving forward, copy both files to a safe location outside the server, such as:
- Your local computer
- External storage
- Cloud storage
- Another backup server
These files will be extremely helpful later when restoring applications and repositories on the new Rocky Linux 10.1 installation.
If this saved you from losing track of your installed packages, who’s planning the same migration.
Back Up Configuration Files and Application Data
Before reinstalling Rocky Linux 10.1, back up your important system configuration files and application data and the most important directory to save is /etc, which contains configuration files for almost every service running on the system, including:
- SSH server settings
- Network configuration
- Firewall rules
- Cron jobs
- Web server configs
- System services
- User authentication settings
Create a compressed backup archive of the entire /etc directory with:
sudo tar -czvf ~/etc-backup-$(date +%Y%m%d).tar.gz /etc
Example output:
tar: Removing leading `/' from member names
/etc/
/etc/mtab
/etc/fstab
/etc/crypttab
/etc/lvm/
/etc/lvm/devices/
/etc/lvm/devices/system.devices
/etc/lvm/archive/
/etc/lvm/archive/rlm_00000-1844072514.vg
/etc/lvm/backup/
/etc/lvm/backup/rlm
/etc/lvm/cache/
/etc/lvm/profile/
/etc/lvm/profile/cache-mq.profile
/etc/lvm/profile/cache-smq.profile
/etc/lvm/profile/command_profile_template.profile
/etc/lvm/profile/lvmdbusd.profile
/etc/lvm/profile/metadata_profile_template.profile
...
The $(date +%Y%m%d) part automatically adds today’s date to the filename, which makes it easier to identify backups later.
The following message is completely normal, which means the archive stores relative paths instead of absolute ones, which helps prevent accidental overwrites during extraction.
tar: Removing leading `/' from member names
Next, back up your home directories and application data.
sudo tar -czvf ~/home-backup-$(date +%Y%m%d).tar.gz /home
sudo tar -czvf ~/var-www-backup-$(date +%Y%m%d).tar.gz /var/www
If your server runs MySQL or MariaDB, export the databases before backing up anything else, because database files should always be dumped properly instead of copied directly while the server is running.
sudo mysqldump --all-databases > ~/all-databases-$(date +%Y%m%d).sql
After all backups finish, move them to a safe external location such as:
- Another server
- NAS or NFS storage
- External drive
- Cloud storage
Never keep the only copy of your backups on the same disk you are about to erase during the Rocky Linux 10.1 installation.
Note Your Network Settings and Enabled Services
Before reinstalling the system, make a record of your current network configuration, which is especially important for servers using a static IP address.
After installing Rocky Linux 10.1, the network interface name may change due to a newer kernel or hardware detection rules. If that happens, your old network configuration may no longer work automatically.
Start by checking your current network interfaces and IP addresses:
ip addr show
Next, check the default gateway configuration:
ip route show
Write down the following details somewhere safe:
- Network interface name
- Static IP address
- Subnet mask or CIDR range
- Default gateway
- DNS servers (if manually configured)
Having this information ready will make it much easier to reconnect the server after the fresh installation.
Next, export a list of all services currently enabled to start automatically during boot.
sudo systemctl list-unit-files --state=enabled --type=service > ~/enabled-services.txt
This file acts as your post-install checklist, because after installing Rocky Linux 10.1, you can review it line by line to reinstall and re-enable the same services that were running on the old system.
It’s a simple step, but it helps prevent situations where important services like SSH, web servers, databases, or monitoring tools are accidentally forgotten after the migration.
If this helped you put together a solid pre-migration checklist, before they start their own upgrade.
Download and Verify the Rocky Linux 10.1 ISO
For servers, the minimal ISO is usually the best choice because it installs only the core operating system without unnecessary desktop packages or extra software.
Download the ISO with:
curl -LO https://download.rockylinux.org/pub/rocky/10/isos/x86_64/Rocky-10.1-x86_64-minimal.iso
After downloading the ISO, always verify its checksum before using it.
curl -LO https://download.rockylinux.org/pub/rocky/10/isos/x86_64/Rocky-10.1-x86_64-minimal.iso-CHECKSUM
sha256sum -c Rocky-10.1-x86_64-minimal.iso-CHECKSUM
Expected output:
Rocky-10.1-x86_64-minimal.iso: OK
If you see OK, the ISO is valid and safe to use. If the verification shows FAILED, the ISO is corrupted or incomplete.
In that case:
- Delete both downloaded files
- Download them again
- Run the checksum verification once more
Never install an operating system from an unverified or corrupted ISO image, which can lead to installation failures or unstable system behavior later.
Install Rocky Linux 10.1 on Your Server
Once your backups are complete and the ISO is ready, you can begin the fresh Rocky Linux 10.1 installation.
Boot the server using the Rocky Linux 10.1 ISO:
- On physical hardware, create a bootable USB drive and boot from it.
- On a VPS or dedicated cloud server, mount the ISO through your provider’s rescue or remote console panel.
Rocky Linux 10.1 still uses the Anaconda installer, but there is one important change compared to Rocky Linux 9:
- The root account is disabled by default during installation.
- Instead of setting a root password directly, you create a normal user account and give it administrator privileges through
sudo.
As you move through the installer, configure the following sections.
- Keyboard and language: set your locale and timezone.
- Software Selection: choose Minimal Install for servers.
- Installation Destination: select your disk and use automatic partitioning, or configure LVM manually if needed.
- Network and Hostname: enter the static IP, subnet, and gateway you noted earlier.
- User Creation: create your admin user and check “Make this user administrator“.
After the install finishes, reboot into the fresh Rocky Linux 10.1 system and log in as your admin user and run a full update immediately to pull in any patches released since the ISO was built:
sudo dnf update -y
After the update completes, verify the installed Rocky Linux version:
cat /etc/rocky-release
Expected output:
Rocky Linux release 10.1 (Red Quartz)
At this point, you now have a clean and fully updated Rocky Linux 10.1 installation ready for restoring your applications, data, and services.
Restore Configuration Files and Reinstall Packages
After the fresh Rocky Linux 10.1 installation is complete, copy your backup files back onto the new system. At this stage, avoid restoring the entire /etc directory all at once.
Configuration file formats and service defaults can change between Rocky Linux 9 and Rocky Linux 10, so replacing the whole directory blindly can break services or overwrite newer system defaults.
Instead, restore only the specific configuration files you actually need, and review them before restarting services.
For example, to restore your SSH server configuration:
sudo tar -xzvf etc-backup-20260528.tar.gz etc/ssh/sshd_config -C /
Use the same method for other important configuration files, such as:
/etc/nginx/nginx.conf/etc/fstab/etc/hosts/etc/crontab- Files inside
/etc/cron.d/ - Application-specific configs
After restoring a config file, always review it carefully before restarting the related service, because some old directives may no longer work in Rocky Linux 10.1.
Next, reinstall your applications using the package list you exported earlier.
sudo dnf install $(awk 'NR>1 {print $1}' ~/installed-packages.txt | cut -d. -f1 | tr '\n' ' ')
You may notice some warnings like:
No match for argument
This usually happens because:
- Some EL9 packages were renamed in EL10
- Certain packages were removed entirely
- Third-party repositories have not yet published Rocky Linux 10 versions
When this happens, do not ignore it blindly and search for the newer EL10 package name or an updated replacement package.
After reinstalling packages, re-enable your services using the enabled-services.txt file you exported earlier.
sudo systemctl enable --now nginx sshd chronyd
Continue working through your enabled-services.txt checklist until every required service is installed, enabled, and running correctly.
One important Rocky Linux 10.1 change to be aware of that the old dhcp-client package has been removed. DHCP handling is now managed internally by NetworkManager.
If you previously used scripts that called:
dhclient
you should update them to use nmcli commands instead.
Verify Firewall and SELinux
Before considering the migration complete, verify that both the firewall and SELinux are configured correctly.
Rocky Linux 10.1 enables both by default:
- firewalld manages network firewall rules.
- SELinux runs in enforcing mode for security protection.
Start by checking the current firewall configuration:
sudo firewall-cmd --list-all
Example output:
public (active)
  target: default
  interfaces: eth0
  services: dhcpv6-client ssh
  ports:
If your server runs a web server like Nginx or Apache, allow HTTP and HTTPS traffic again:
sudo firewall-cmd --permanent --add-service=http --add-service=https
sudo firewall-cmd --reload
Next, verify SELinux status:
sestatus
Expected output:
SELinux status:                 enabled
Current mode:                   enforcing
Mode from config file:          enforcing
Policy from config file:        targeted
For production systems, enforcing mode is the recommended and secure configuration.
Sometimes restored applications fail to start because SELinux blocks access to files, ports, or network connections. If that happens, check the SELinux audit logs first before making changes.
sudo ausearch -m avc -ts recent
Expected output:
time->Thu May 28 12:45:00 2026
type=AVC msg=audit(1748421900.123:456): avc:  denied  { name_connect } for  pid=1234 comm="nginx" ...
This output shows:
- Which process was blocked
- What action was denied
- When the denial occurred
Instead of switching SELinux to permissive mode, use the audit logs to create the correct SELinux policy adjustment with tools like audit2allow.
Warning: Setting SELINUX=permissive in /etc/selinux/config to fix a service startup issue on a production server is a security risk. Always investigate the denial with ausearch first before touching the SELinux mode.
If you found this migration guide useful, before anyone attempts an unsupported in-place upgrade.
Conclusion
Upgrading from Rocky Linux 9 to Rocky Linux 10.1 is really a migration process, not a traditional in-place upgrade. Instead of running a single upgrade command, you built a clean Rocky Linux 10.1 system from the ground up while safely preserving your existing applications, services, and data.
Along the way, you:
- Verified CPU compatibility for x86-64-v3 support.
- Exported installed package and repository lists.
- Backed up system configuration files and application data.
- Recorded network settings and enabled services.
- Performed a clean Rocky Linux 10.1 installation.
- Restored configurations, packages, databases, and services.
- Verified firewall and SELinux settings after the rebuild.
It takes more planning than an automated upgrade, but the result is usually a much cleaner and more stable system with fewer hidden problems later.
Before scheduling any migration, the very first thing you should do is run the CPU compatibility check from the beginning of this guide. Confirm that all required x86-64-v3 flags are present on your Rocky Linux 9 server before investing time in backups and reinstallations.
If you’ve already migrated a production system from Rocky Linux 9 to Rocky Linux 10.1, share your experience in the comments.
If this article helped, with someone on your team.
